How to filter and sort tasks and projects
Introduction
Filtering and sorting help you focus on specific tasks or projects. This facilitates the efficient management of your workload.
Steps to filter and sort tasks
Step 1: Open your project
Access the Projects application.
Select the project containing the tasks you want to filter or sort.
Step 2: Access filtering and sorting options
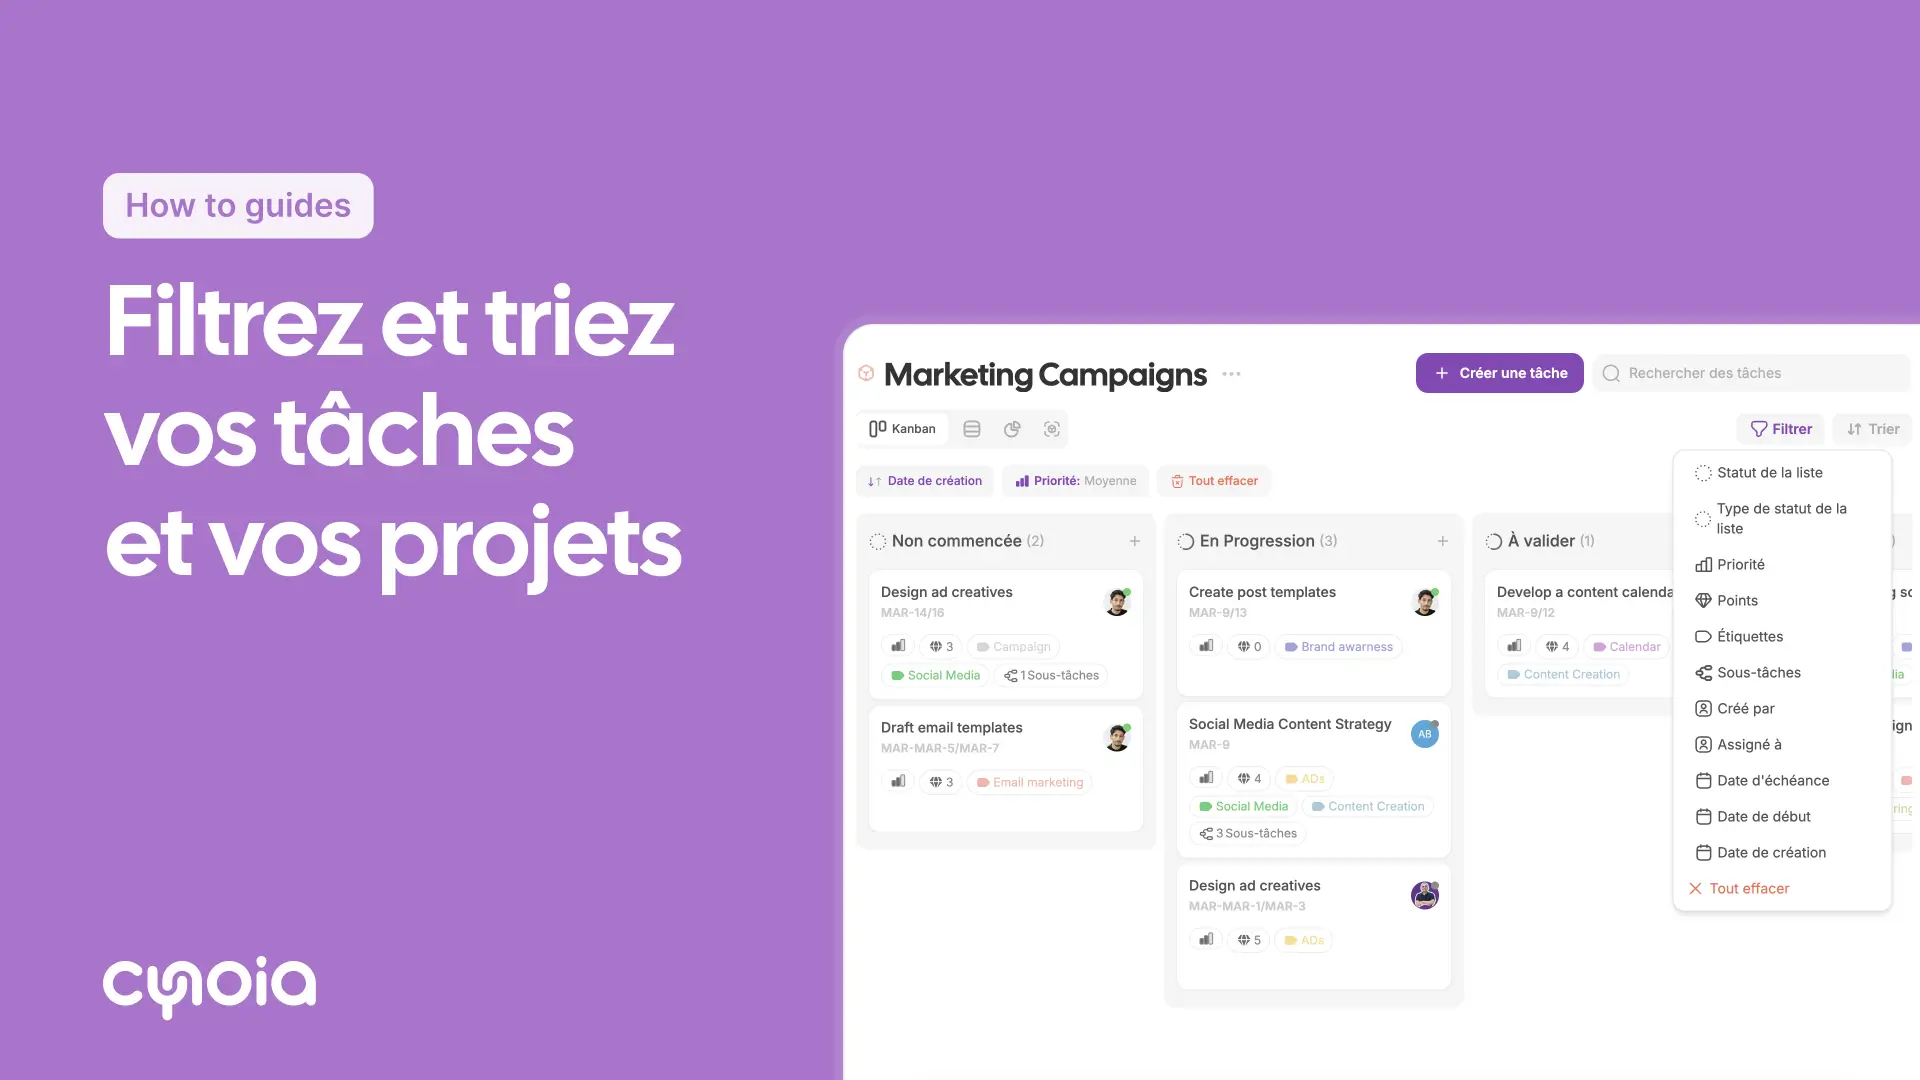
At the top of the tasks section, click on the Filter or Sort icons.
Step 3: Apply filters
Choose filtering criteria such as:
Status: Status of tasks
Labels: Labels of tasks
Priority: Levels of priority
Points
Sub-tasks
Created by
Assigned to
Due date
Start date
Creation date
Step 4: Sort tasks
Select sorting criteria:
Due date
Priority
Name
Points
Start date
Creation date
Steps for projects
Step 1: Access the list of projects
In the Projects application, display the list of main projects.
Step 2: Apply filters and sort
Use the available options:
Filters:
Visibility
Members
Progress
Creation date
Sort by:
Name
Progress
Creation date
Last updated
Tips
Combine filters: Use multiple filters to get precise results.
Save time: Filtering helps focus on important items.
Reset filters: Don’t forget to disable filters when you are done.
FAQ
Q1: Can I save my filtering settings?
Currently, saving filter presets is not available.
Q2: Does filtering affect other team members?
No, filters are user-specific and do not affect other users' views.
Q3: Can I filter tasks across all projects?
Filters are applied project by project. Use the dashboard for inter-project views.